In my travels worldwide, I have had to remove a sim card from my iPhone many times. Though very much an ordinary task, it may sometimes cause a nuisance to the user. I have actually seen a great many people trying hard or grappling with themselves to remove or change their sim cards from their iPhones. In this article, I will share with you how to change your iPhone sim card by following the instructions given below.
Why Follow The Instructions To Remove Or Change Your iPhone Sim Card
Instructions on how to insert/remove your iPhone sim card can help with activation issues/errors, browser connection issues, and a blank or frozen screen. On the other hand, failing to follow these instructions not only causes a loss of time and energy but also imparts sheer irritation and frustration on the part of the user. Also, being unable to use different aspects of your device correctly enhances your chances of damaging or spoiling it way before its real life span.
Read more: Top 4 Tips To Help You Fix Your Broken iPhone
Three Basic Steps To Remove Or Change Your iPhone Sim Card
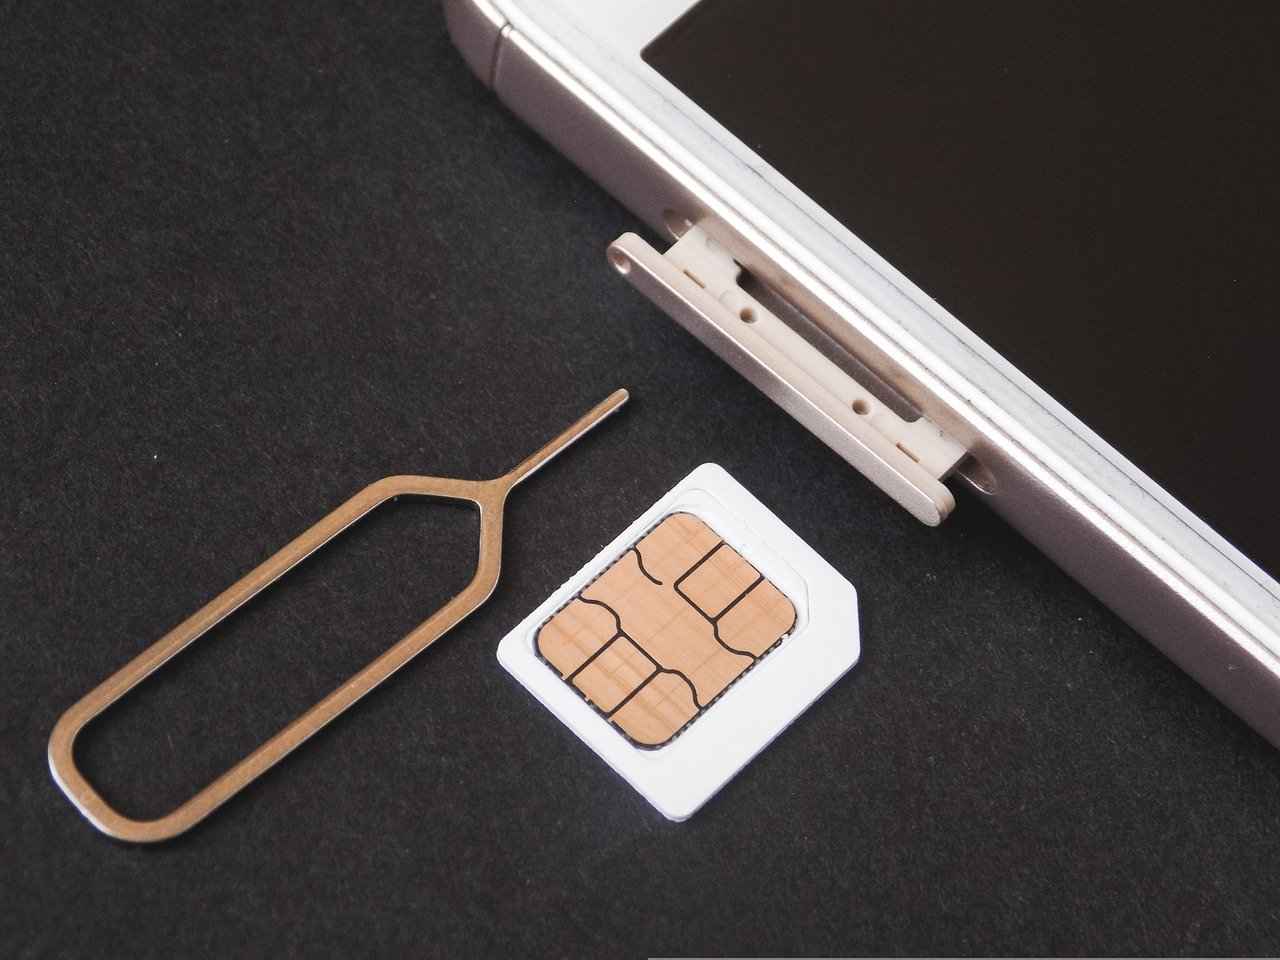
Find your device model written below to determine where the SIM tray is located. To open the SIM tray, insert the end of a paper clip or SIM eject tool into the hole next to the tray. Then apply pressure on the iPhone, but don’t force it. However, if you’re having trouble removing the SIM tray, take your device to your carrier or an Apple Store for help.
After removing the iPhone SIM card from the tray, take a look at the notch on one end of the new SIM card. Put the new SIM card in the tray; it will only fit in one particular position because of the notch mentioned above. Then insert the tray fully into the device keeping the same orientation as when you removed it. Also, the tray only fits one way.
Caution To Keep In Mind While Removing Or Changing Your iPhone Sim Card
Do not try to insert/remove the iPhone SIM card if the mobile is turned on. Doing so could damage the SIM card and/or the device. Moreover, it is much better to follow the above-mentioned steps to remove or change your sim card.
Please do not modify or alter the SIM card; it will do you no good.
If you use an eSIM, there is no need to insert or remove the physical SIM card. Besides, things will keep going on all the same.
Devices With The Sim Tray On Their Left Side
The SIM tray is located on the left side of the following devices:
- iPhone 13 Pro
- iPhone 13 Promax
- iPhone 13
- iPhone 12
- iPhone 12mini
- iPhone 12 Pro
- mini iPhone 12 Promax
Sim Trays With Two Nano-sim Cards
In mainland China, the SIM tray of the iPhone 13 Pro Max, iPhone 13 Pro, iPhone 13, iPhone 12, iPhone 12 Pro, and iPhone 12 Pro Max can hold two Nano-SIM cards.
Two Nano sim cards can be inserted in the sim tray of the iPhone 11, iPhone XR, iPhone XS Max, iPhone 11 Pro y iPhone 11 Pro Max in mainland China.
Devices With The Sim Tray On Their Right Side
The SIM tray is located on the right side of the following devices:
- iPhone 11Pro
- iPhone 11
- iPhone 11 PromaxiPhone XS
- iPhone XSMax
- iPhone XR
- iPhone X
- iPhone SE (1st, 2nd, and 3rd generation)iPhone 4 (GSM model)
Also, Then, iPhone 8Plus and iPhone 6Plus
- iPhone 8
- iPhone 6
Also iPhone 7Plus and iPhone 5s
- iPhone 7
- iPhone 5c
And iPhone 6sPlus
- iPhone 5
- iPhone 6s
- iPhone 4s
Below find more articles to read:
- How Accurate Is Find My iPhone?The Truth Behind The App
- How To Clean Your iPhone Charging Port In 6 Simple Steps